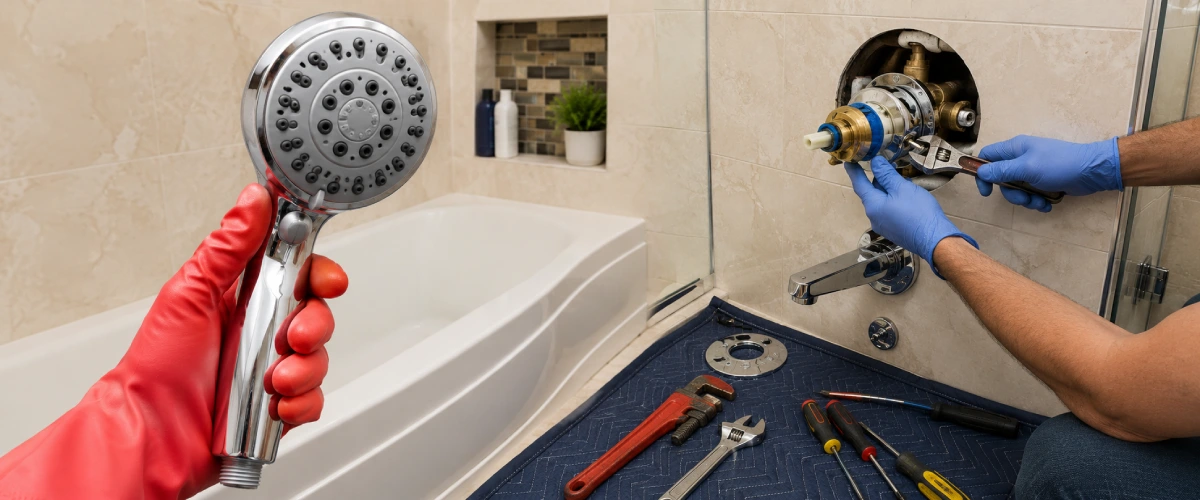
When your shower turns scalding without warning, keeps trickling after the handle is closed, or takes a struggle to turn, the valve is the most likely cause. Behind the wall, the shower valve mixes your hot and cold supply lines into a single stream before the water travels to the shower head. You can often avoid replacing a shower valve altogether. Many of these problems trace back to the cartridge, a removable part inside the valve that can be swapped without opening the wall. In this blog, we will discuss how to tell which repair you need, the basic steps for each, and when a licensed plumber is the safer choice. For anything beyond a simple repair, Parzival Plumbing offers bathroom plumbing services throughout Orange County.
Signs You Need to Replace a Shower Valve
Inside a typical shower valve, the cartridge is made of brass or plastic, and rubber O-rings keep water from slipping past it. Mineral deposits and years of use wear those seals, so symptoms creep in slowly.
Temperature That Swings
If the water jumps hot or cold when a toilet flushes, the cartridge may no longer be balancing pressure. If every tap in the house runs lukewarm, look at the water heater first.
Weak flow at the shower only
Mineral buildup inside the cartridge can restrict the water moving through it. Before blaming the valve, inspect the shower head, because clogged spray holes can reduce the flow in exactly the same way.
Dripping after shutoff
If the shower head or tub spout keeps releasing water after the handle is shut off, the seals inside the cartridge have most likely worn out.
A stiff or loose handle
Stiffness often comes from mineral buildup. A handle that spins without changing anything may simply have a stripped connection, which shower handle replacement can fix.
Water Marks or Spongy Walls Around the Shower
Ceiling marks below or loose tile around the toilet can mean a leak inside the wall, which often involves the valve body itself.
Handle, Cartridge, or Full Valve: What Needs Replacing?
Most drips, stiff handles, and temperature swings are solved with a new cartridge, so replacing a shower valve outright is rarely the first step. Swapping out the entire valve makes sense only if the housing has cracked, corroded, or started leaking at its pipe connections, or if the manufacturer no longer supplies parts for an older model. Shower handle replacement is the simplest plumbing fixture repair. It suits a cracked handle, worn finish, or stripped handle connection. The new handle must fit your existing cartridge, so buy trim made for your valve’s brand and series.
Cartridge replacement is a manageable job done from the front, through the opening behind the trim plate, so the wall stays closed. Valve body replacement means reaching the pipes behind the wall, disconnecting the old valve, and connecting a new one. A full shower valve installation is the largest and riskiest of the three jobs.
How to Identify the Right Shower Valve
Cartridges are not universal, even within one brand. You cannot substitute one of these Moen cartridges, the 1222 or the 1225, for the other. One turns on by rotating the handle; the other by pulling it out. Look for a logo on the handle or trim, notice how the handle operates, and check out old paperwork for a model number. Once the cartridge is out, bring it to the supply store or use the manufacturer’s identification guide.
This also matters for safety. The California Plumbing Code requires shower valves to be pressure balancing, thermostatic, or both, and limits showerhead water to 120 degree fahrenheit. A pressure balancing valve reacts to sudden pressure; a thermostatic valve holds a set temperature. The wrong cartridge can defeat that scald protection. The same rule applies to shower handle replacement, because trim must match the valve behind it.
Tools and Preparation for Replacing a Shower Valve
A cartridge job typically needs screwdrivers, Allen keys, Pliers, the correct cartridge, rags, and a thermometer. Some brands sell a puller made for their valves. A valve body replacement adds a new valve, a tubing cutter, matching fittings, and a drywall saw.
Do not start taking the valve apart until the water supply is shut off. Some valves have built-in shutoffs, called service stops, behind the trim. If yours doesn’t, turn off the home’s main water shutoff, then run the shower on full hot and full cold until the water stops completely. Cover the drain so small parts cannot disappear, and take photos as you work disappear, and take photos as you work to make reassembly easier.
How to Replace the Shower Valve Cartridge
Clips, nuts, and removal tools vary by manufacturer, so keep the instructions for your model nearby.
Step 1
Take off the handle and trim. For a straightforward shower handle replacement, you may be finished as soon as the new handle is on. To get the old one off, look for a screw beneath a small cap, or for a set screw at the base of the handle. If the trim plate is caulked, slice the caulk with a utility knife rather than prying.
Step 2
Remove the retaining hardware. Depending on the design, this is a U-shaped clip, a retaining nut, or a bonnet nut. Note which way the cartridge faces.
Step 3
Pull the cartridge straight out. When the cartridge resists, reach for a puller designed specifically for your valve. Pliers or a screwdriver can crack the brass body, so if the right tool fails, stop and call a plumber.
Step 4
Clean the inside of the valve body with a soft cloth, then look it over for cracks or signs of corrosion. Do not scrape the inner surfaces the cartridge seals against.
Step 5
Seat the new cartridge so it faces the same way the old one did. Grease the O-rings only if the instructions say to, and tighten the clip or nut snugly.
Step 6
Open the water supply back up gradually, leaving the trim off so the valve stays in view. Run the shower fully hot and fully cold, shut it off, and watch for drips over the next few minutes.
Step 7
Set the temperature limit stop. Run the hottest water, measure it at the showerhead, and adjust the stop as the manufacturer describes so it stays at or below 120°F. Then reinstall the trim and handle.
How to Replace a Shower Valve Body
Replacing a shower valve at the body level involves concealed pipes, where a small mistake can leak unnoticed for weeks. Read the new valve’s instructions before starting the shower valve installation, and ask your city’s building department whether a permit is needed.
Step 1
Drain the lines. Close the main shutoff, then open the shower and the lowest faucet in the house.
Step 2
Reach the valve from the easiest side. Check for an access panel behind the shower wall, often in a closet. If none exists, opening drywall there is usually simpler than removing tile. Locate studs, cut power to nearby circuits, and start with a small inspection hole.
Step 3
Disconnect the old valve. Threaded joints come apart with two wrenches, one holding the pipe still. Soldered copper is usually cut with a tubing cutter, and PEX needs tools that match its fitting system. A torch inside a wall can ignite framing or insulation, and old galvanized pipe can crack when disturbed, so either is a good reason to call a professional for bathroom plumbing services.
Step 4
Set and connect the new valve. Follow its “UP” and hot and cold markings, use the plaster guard to set depth, and fasten it to the framing. If soldering, check whether the cartridge must come out first to protect its seals.
Step 5
Test before you close anything. Restore the water slowly and let the system pressurize. Some valves include a test cap for checking the body before the cartridge goes in. Press a dry paper towel against every joint, wait, and check again. Then install the cartridge, test hot and cold, and set the limit stop.
Step 6
Close the wall only when every joint stays dry. Installing an access panel instead of a drywall patch makes future repairs easier.
When to Hire an Expert for Shower Valve Replacement
When replacing a shower valve, bring in a licensed plumber if the water will not fully shut off, the cartridge is stuck, the valve body is cracked or corroded, or water has reached the wall. The same applies to soldering, galvanized pipe, tile removal, uncertain part compatibility, or a temperature that will not set correctly.
Parzival Plumbing offers bathroom plumbing services throughout Orange County, from shower valve installation to plumbing fixture repair. If you suspect a hidden leak, our water leak detection service can track it down before anyone cuts into your walls. Give us a call, and our team will quickly reach the location.
Final Thoughts
Replacing a shower valve is manageable when the problem ends at the cartridge, but a damaged valve body, hidden leaks, or unfamiliar piping call for a professional. Parzival Plumbing is based in Costa Mesa and serves homeowners throughout Orange County. We offer same-day plumbing services, and we are available 24/7 for emergencies. If another company has already given you a quote, we will happily give you a free second opinion, and our pricing is always laid out clearly before work begins. If your shower leaks or the temperature will not hold steady, we can inspect it and recommend the right repair.